Collapse
CollapsingX
  • - or -

Procedure for using the LoadImage step


The LoadImage step allows you to load images from files stored on disk. There are 4 sets of options depending on the mode of the ImageSource property.

The following provides a basic methodology for using the LoadImage step:

  1. Set the ImageSource property in the Configuration pane.

  2. Set the LoadImage options relevant to the mode of the ImageSource property.

  3. Optionally, if you are in Emulation mode, click on the Set alternate paths button, in the Interface Actions pane.

  4. Optionally, set the Calibration property.

Image source

There are 4 modes for the ImageSource property, each of which determines where to look for the image file(s) to load. For more information on image source modes, see the Procedure for configuring image sets section in Chapter 29: Acquisition using image sets.

  • SingleFile mode. This selects a single image file to load. The image file must be specified using its absolute path, including the file extension.

  • SequenceFile mode. This selects a text file which contains the paths of several image files to load. The SequenceFile (text file) must specify one image file per line. Each image file must be specified using its absolute path, including the file extension.

  • NumberedFiles mode. This selects a folder containing several numbered image files to load. The LoadImage step makes an ordered list of files beginning by RootName and ending with numbers between FirstNumber and LastNumber in the specified folder (for example, testImage001 to testImage050). Only files with the specified extension will be added to the list. To automatically update the list of files, select the UpdateFileList option.

  • Folder mode. This selects a folder containing several image files to load. The LoadImage step makes a list of files in the specified Folder that match the specified FileTypes. To update the list of files, set the UpdateFileList input.

The following explains the file/folder settings for each image source mode. Regardless of the mode, all paths must be absolute, not relative (no ".../filename" allowed; you must include the root folder in all paths). Paths can be local to the runtime platform, or point to a network location, for example, \\\\<server name>\\<share name>. You can use functions in a file path, for example, if you want the path to vary depending on the current recipe. In this case, use the CURRENTRECIPE function as in {PATH("DA Documents")}\\SavedImages\\{CURRENTRECIPE()}. This technique works well in conjunction with an ImageWriter step that writes to a folder with the same name as the current recipe.

For more information on how to specify a path and acquire permission to a network folder, see the Specifying a path section in Appendix A: Expression syntax. For more information on setting an alternate path when working without access to the runtime platform's disk, see the LoadImage in emulation mode subsection of this section.

LoadImage options

In the Configuration pane you can set the LoadImage options, some of which are relevant only to the image source mode selected. The following options are common to all modes except SingleFile mode:

  • The Direction property is used to specify which direction to navigate through the list of image files.

  • The Skip file on error property is used to make the LoadImage step automatically load the next image if an error occurs when loading a file. This option is not available when in SequenceFile mode.

  • The Update file list property is used to decide if the LoadImage step should update its list of files every time it runs. This setting can be useful when images are added or deleted from a folder by another process.

  • The Lock on image property is used to stop iterating through the list of files at the file specified by the Locked image name property.

LoadImage in emulation mode

The LoadImage step works best when you are connected to a runtime platform, so all paths in the Configuration pane are either local to the runtime platform or point to a network location. If you are working in emulation mode, the platform paths are not available and you need to fetch the images from some alternate location.

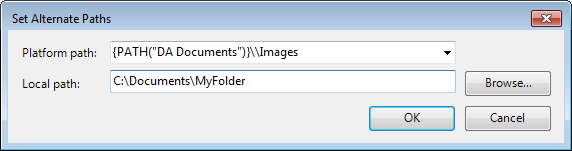
When in emulation mode, the Set alternate paths button becomes available in the Interface Actions pane. After pressing this button, you can then substitute a runtime platform path with a path on the development computer (from the Set Alternate Paths dialog). For example, the image below shows the runtime platform path, {PATH("DA Documents")}\\Images, being replaced with the local path, C:\Documents\MyFolder. You can either enter paths and files manually, or browse for them. The path that you enter here should be the same as the path in the Folder text box in the Configuration pane of the LoadImage step.

Calibrating loaded images

To work in calibrated world coordinates, you must associate a calibration file with the LoadImage step.

Note that you must associate a calibration file before you define any search regions or positions in the loaded image.

In emulation mode, calibration files are stored with the project files. See the Calibration in emulation mode subsection of the Calibration section in Chapter 30: Calibration for more information on creating calibrations in emulation mode.

Updating the calibration file for a loaded image

In the Configuration pane, there are several features that you can use to adjust the properties of the calibration file:

  • To set the CalibrationName property, you can either select the calibration file from the dropdown list of calibrations currently saved on the runtime platform, or link a value.

  • To generate a second output image which has been physically corrected (warped) according to the calibration mapping to correct for distortions, enable the Correct image option.

  • With the CorrectImage property enabled, you can set the Overscan property and the InterpolationMode property. The Overscan property has 2 options: Clear sets background pixels in the corrected image to black, while Disable leaves the background as it is.

To view the corrected image, select LoadImage.CorrectedImage from the list displayed by the View Display Image menu item.