Procedure for using the CNNClassIndex step
 Previous
- Next

The following procedure provides a basic methodology for using the CNNClassIndex step to classify images with a pretrained CNN.
-
Optionally, modify general classification settings.
-
Run the project to the CNNClassIndex step to ensure your project works as you expect (for example, you can view your results).
 Import a
pretrained CNN
Import a
pretrained CNN
Modify general
classification settings
Optionally, after importing a pretrained CNN, you can choose to adjust the CNNClassIndex step's general settings from the Configuration pane.
-
Set the Timeout property to specify the maximum time for the classification process.
-
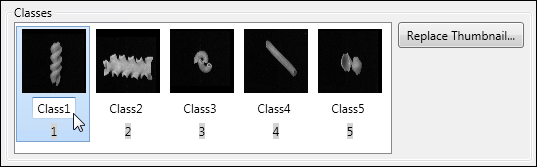
Rename the classes to something more meaningful (for example, you can change 'Class1' to 'Fusilli'). Right-click on the name to change it.
-
Click on the Replace Thumbnail... button to modify the images that visually represent the classes.
The thumbnail images serve as a visual aid to help you recognize the classes. They do not affect the classification process or results.
-
Click on the Define a region (
 ) toolbar button in the
Project toolbar to define the region, in the image, in
which to perform the classification. You can specify the entire
image or a rectangle as the
search region. The images (or the specified ROI) must have the
same width, height, and number of color bands as the images with
which the imported CNN was trained.
) toolbar button in the
Project toolbar to define the region, in the image, in
which to perform the classification. You can specify the entire
image or a rectangle as the
search region. The images (or the specified ROI) must have the
same width, height, and number of color bands as the images with
which the imported CNN was trained.
View your
results
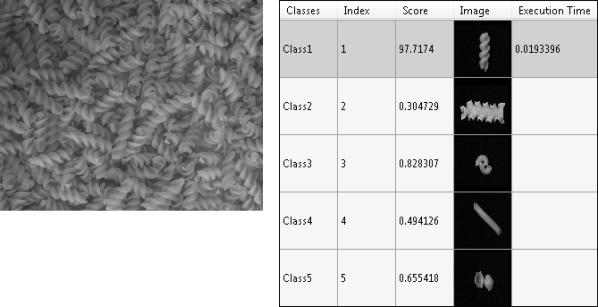
The result that you will generally be most interested in is the class to which the image belongs. This is referred to as the best class.
Each class is given a score. This score is a measure, in percentage, of how well that class represents the image. The class with the highest score is the best class. The following example shows an image and its class results. The best class is highlighted. Results also include each class' name, index, thumbnail image, and the time it took to establish the best class.